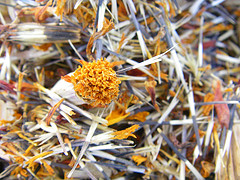
Saving flower seeds is one of the biggest money savers in your garden. I have been saving seeds for years and it’s very easy. I do it because it’s an easy way to get more plants each year. When I save the seeds I planted this year I know exactly what color and size they will be so I can use them next year. It’s especially great if you want to plant masses of flowers like zinnas and want all one color.
As you collect the seeds put seeds from each flower in a separate envelope or paper bag and label. This way you don’t get seeds mixed up. I don’t make my labeling anything fancy. If I know the variety I will put it on there otherwise I just say “short yellow marigold”, “short peach zinna”, tall 3ft dark red zinna, pink cosmos etc.
Saving Flower Seeds Tips
Don’t collect seeds when they are damp. Mid to early afternoon on a dry day is best although there have been many late nights in the rain when I’ve run out to grab some seeds that were going to freeze that night. 🙂 The main thing was right after I collected them I let them dry.
Seeds have to be collected off the flowers that are dying on the plant. That is the only way they mature.
You will know the seeds are ready when the flower looks dead and the seeds are loose. If they are in pods like poppies or coreopsis then the pod will begin to break open. In this case you can hold your bag or envelope over the seed head and just shake the seeds into the bag. As a general rule if the flower head looks dead and dry then the seeds will most likely be ready.
You can leave the seeds in the paper bag or lay seeds on paper plates, a cookie sheet or newspaper and allow to dry. Be sure to label the paper plate with what the seed is so you don’t forget. 🙂 I have used small dixie cups to dry seeds. They work really well because you can line a bunch up on a try and fill them. Then I can easily move to an out of the way spot such as on top of the refrigerator to dry.
If seeds are in a pod then break open the pods and let the seeds fall into the bag, cup or paper plate.
If you decide to leave them in the paper bag, leave the top open and shake every day for air circulation. You want the seeds dry before storing. This usually takes 2-7 days.
When dry, remove as many of the stems and flowers that you can. You want only seeds.
When the seeds are dry put in envelopes and label. Then put them in a bin in the refrigerator to store over the winter. Freezing and heat is deadly to seeds. I once had to store my seeds in the garage and they were pretty much all dead the next year. 🙁 If you want you can put a bunch of seeds in a glass jar, ice cream container or shoebox to store in the refrigerator. You don’t have to but if you save the silica packets from things like new shoes, new purses etc. you can put one of those in with it to absorb any excess moisture.
You can put seeds in other containers such as:
frosting or yogurt containers
Altoid mint containers
Tic Tac conatiners
pill bottles
lip balm containers
mechanical pencil lead containers
mini m&m containers
any small container with a lid will do.
It’s really not rocket science to save seeds. The main thing is the make sure they are dry and then keep in the fridge so they stay cool until next spring.
If you would like more information because to check out MrBrownThrumb.com he has some great seed saving tutorials.
Tawra
photo by: maureen lunn


For plants with big/long seed heads such as lettuce or amaranth I use a light pillowcase or muslin bag to collect them and leave them somewhere dry for awhile. Holding the top closed, shake it up and then you can just scoop out the seeds from the bottom of the bag. I sometimes use a mesh laundry bag inside another bag so the seeds can fall through the holes into the second bag for easy collection.
I was very sick last year after I planted Nastursiums, but they stayed pretty until the heat of summer set in and they all died. This year they are already thick in the area they were in last year, so I guess that’s just another way to save seeds! I used to do that with Allysum as a ground cover in the rose bed.